Church Settings
Add and Manage Campuses
A campus is a location where your church meets. Every church has one from the day it is created, made from the address entered at signup. Churches on Pro and Enterprise can add more.
Campuses matter because people, events, check-in sessions and attendance can each belong to one, so a leader at one location is not wading through another location’s Sunday.
Add a campus
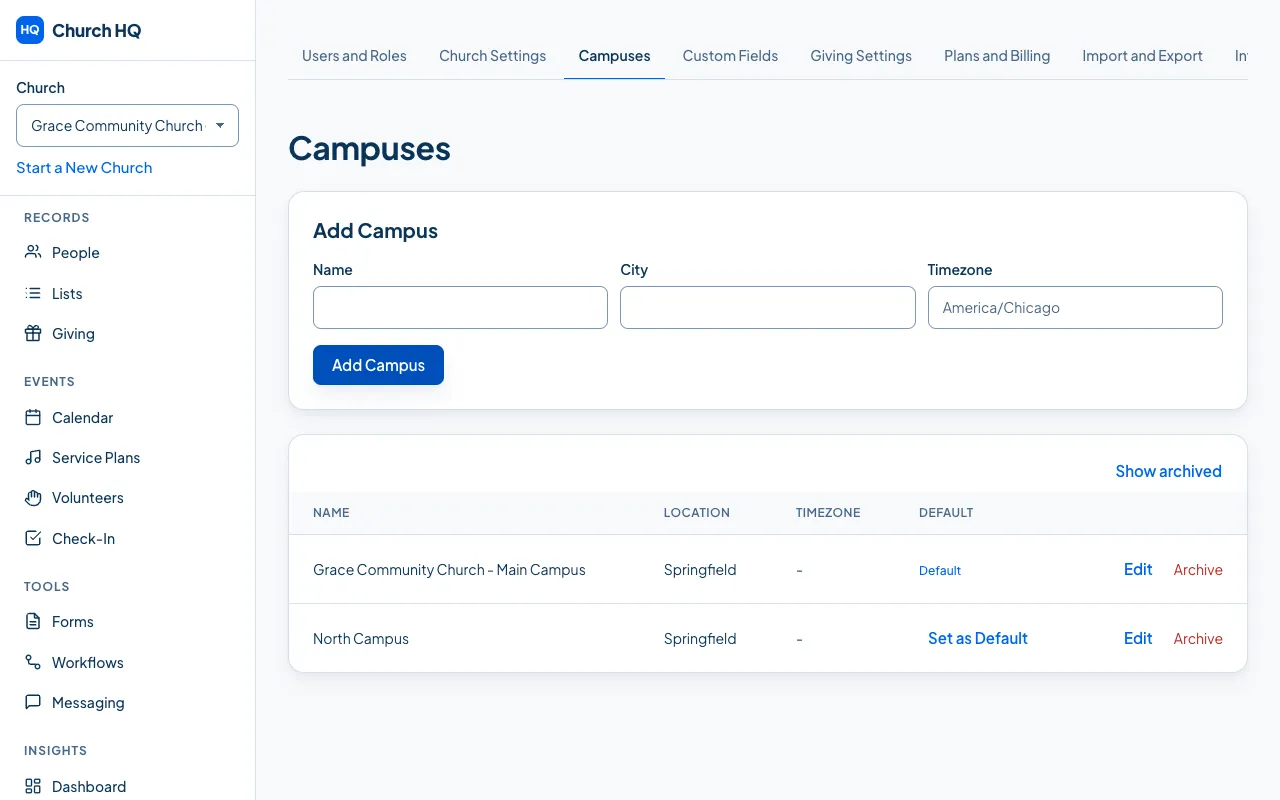
Section titled “Add a campus”- In the sidebar, choose Administration, then the Campuses tab.
- Choose Add Campus.
- Fill in:
- Name, for example
North Campus - City
- Timezone, if this campus is in a different one
- Name, for example
- Save.
Edit a campus
Section titled “Edit a campus”Choose Edit on its row, change what you need, and save. This is also where you correct your main campus address.
Archive a campus
Section titled “Archive a campus”Choose Archive on its row and confirm. The campus stops appearing in pickers; its history stays. Show archived brings archived ones back into view.
Good to know
Section titled “Good to know”- The default campus is marked in the list. It is the one Church HQ assumes when nothing else is chosen, and it cannot be archived.
- Starter includes one campus. Adding more needs Pro. See Upgrade or Downgrade Your Plan.
- “All Campuses” appears in pickers around the app when something is not tied to one location.
Still stuck? Contact the Help Desk at help@mychurchhq.com and tell us which guide you were following.